A while back, I received a request from a reader to help her figure out why her granny squares leaned to the right.
The Youtube video she used to teach her how to make a granny square had an interesting way of ending and beginning rounds, which I thought might be the cause of the problem (it wasn’t).
And while my reader figured out on her own how to correct the problem, it was an interesting research assignment for me because I learned a number of ways to end and begin granny square rounds.
THE GRANNY SQUARE – A SQUARE PEG IN A ROUND HOLE
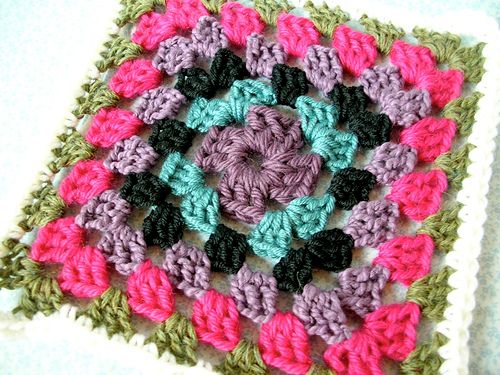
No, “granny square round” is not an oxymoron. If you’re not familiar with how to make a granny square, then you should know that, even though it is called a granny square, it is crocheted in the round. The square shape is accomplished by creating four corners.
In addition, most granny square patterns I’ve seen end and begin the rounds at these corners. But I recently discovered a third method that doesn’t, and I’ll share it with you below.
The three methods to end and begin granny square rounds involve:
- Creating a full corner at the beginning of each round
- Creating half a corner at the beginning of each round
- Beginning a new round depending on where you ended the previous round.
Each method creates a perfectly fine granny square, but as you study them, you might decide that you prefer one method over the other two.
Table of Crochet Abbreviations
I’m using the following set of abbreviations in the pattern instructions for these three methods.
ch – chain
dc – double crochet
rnd – round
st st – slip stitch
st(s) – stitche(es)
The Full-Corner Method
I like to start my granny squares with a “magic adjustable ring” instead of a chain 4. So after making the magic ring (or the ch 4 and joining with a sl st to make a ring, if you prefer), do the following:
Rnd 1: Ch 3 (serves as 1st dc), 2 dc inside the ring, (ch 2, 3 dc) 3 more times, ch 2, sl st to top of the beginning ch-3. You should have four 3-dc groups in the ring, each one separated by a ch-2 space (do not turn at end of the rounds).
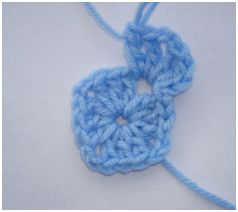
Rnd 2: Sl st to the first ch-2 space, (ch 3, 2 dc, ch 2, 3dc) in the ch-2 space (one full corner made), [ch 1, (3 dc, ch 2, 3 dc) in next ch-2 sp] 3 more times (repeat instructions inside brackets – [] – 3 more times), ch 1, sl st to top of beginning ch-3.
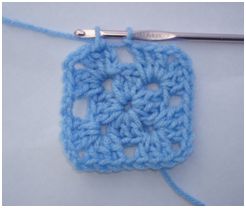
**Note: I’m only giving instructions for the first two rounds because you repeat what you do at the end of the first round and the beginning of the second round in each succeeding round. Instructions for a four-round granny square can be found in the blog post I mentioned in the first paragraph of this post.
The Half-Corner Granny Square Method
As the title suggests, the second method involves beginning the second granny square round with a “half-corner.” Here’s how it’s done:
Rnd 1: Same as the full-corner method.
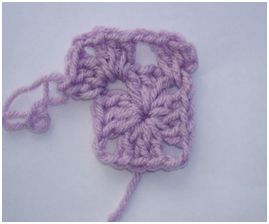
Rnd 2: Ch 3, 2 dc in the ch-2 space made at the end of rnd 1 (half-corner made), [ch 1, (3 dc, ch 2, 3 dc) in next ch-2 sp] 3 more times, ch 1, 3 dc in 1st ch-2 space of previous rnd, ch 2, sl st to top of beginning ch-3.
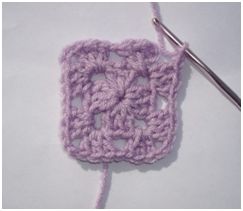
I prefer the first method, making a full corner, because when you only do half a corner, you have to squeeze your 2 dc’s in front of the ch-3, and there’s no real space there to put them in. With the full corner method, you slip stitch across to the first ch-2 space and make the corner there.
But beginning the second round with a half corner doesn’t seem to affect the overall look of the granny square because you can tug the stitches a bit so they look like they all fit in the space.
The It-Depends-on-Where-You-End-the-Round Method
I couldn’t think of a better name for this method, but you’ll understand why I gave it this name as you read the instructions below.
Rnd 1: Same as above.
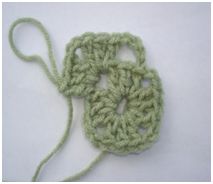
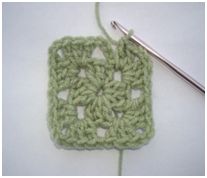
Rnd 2: Ch 4, [(3 dc, ch 2, 3 dc) in the next ch-2 space, ch 1] 3 times (three corners made), (3 dc, ch 2, 2 dc) in the last ch-2 space, sl st to 3rd ch of beginning ch-4.
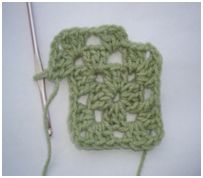
Rnd 3: (Ch 3, 2 dc) in ch-1 space (one 3-dc group made), [ch 1, (3 dc, ch 2, 3 dc) in ch-2 corner space, ch 1, 3 dc in next ch 1 space] 3 more times, ch 1, (3 dc, ch 2, 3 dc) in last corner, ch 1, sl st to top of beginning ch-3.
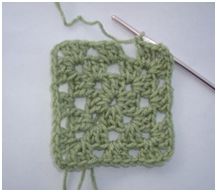
So every time you begin a round at a 3-dc group in the previous round, you ch 4 across it and continue in the established pattern. When you end a round at a ch-1 space, you begin the next round by creating a 3-dc group (actually ch 3, 2 dc) in that ch-1 space and then continuing in the established pattern.
The Turn-Your-Work Method
The “Turn Your Work” method is the solution to the problem my reader had for keeping her granny square from leaning to the right. In fact, this is the way I learned to crochet granny squares years and years ago.
The Turn-Your-Work method not only solved my reader’s problem, it creates a “reversible” granny square. This means that in one round, you see the front side of the stitches and in the next round, you see the back side of the stitches.
The Turn-Your-Work method is demonstrated in five videos, the first of which is presented below.
When you don’t turn your work at the end of the round, one side of the granny square shows the front side of the stitches and the other side of the granny square shows the back side of the stitches.
Which Granny Square Method Do You Prefer?
These are all equally valid ways of crocheting granny squares. Your project will determine which method will work the best.


