No, there isn’t a “Round 1” post; you’ve arrived at the right place as I take you on an odyssey of adventure and discovery in my attempt to design and crochet a granny square cardigan for myself.
I had this big idea a couple of months ago to design a shrug that incorporated a big granny square in the back. The idea came to me after viewing a granny-inspired vest (I say vest instead of shrug because it’s sleeveless) designed by LazyTcrochet I saw on Craftsy.com.
Actually, now that I think about it, I tried to design a granny square sweater several years ago after being inspired by a Lily Chin design. I was able to complete the sweater and wanted to create a pattern for it, but I didn’t know how to grade patterns to fit different sizes, and the pattern never became a reality. So here I am, at it again, trying to come up with a new design for a sweater that at least I can wear.
More Design Attempts
I love the LazyTcrochet vest, but I wanted something with sleeves that would keep my arms warm when sitting in an air conditioned movie theater or on those cool Hawaii nights during the rainy season. All I can say is that the first attempt was a big failure, primarily because the shrug design distorted the granny square back such that it didn’t sit flat on my back the way I wanted it to, but curved under at the left and right bottom edges.
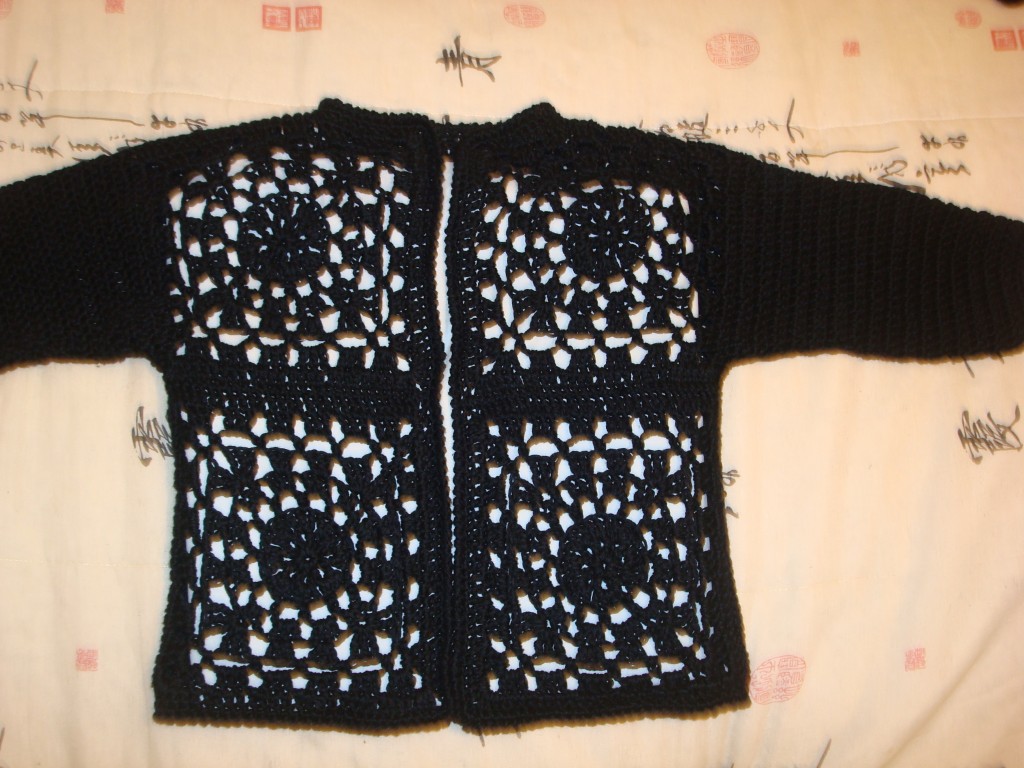
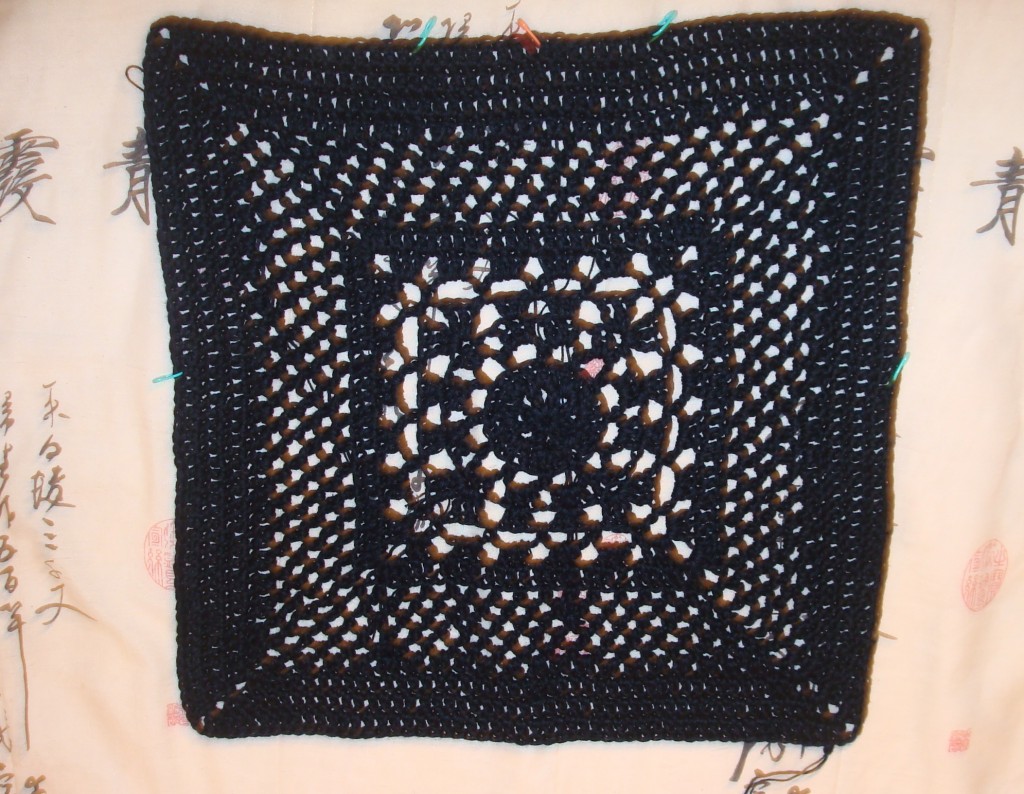
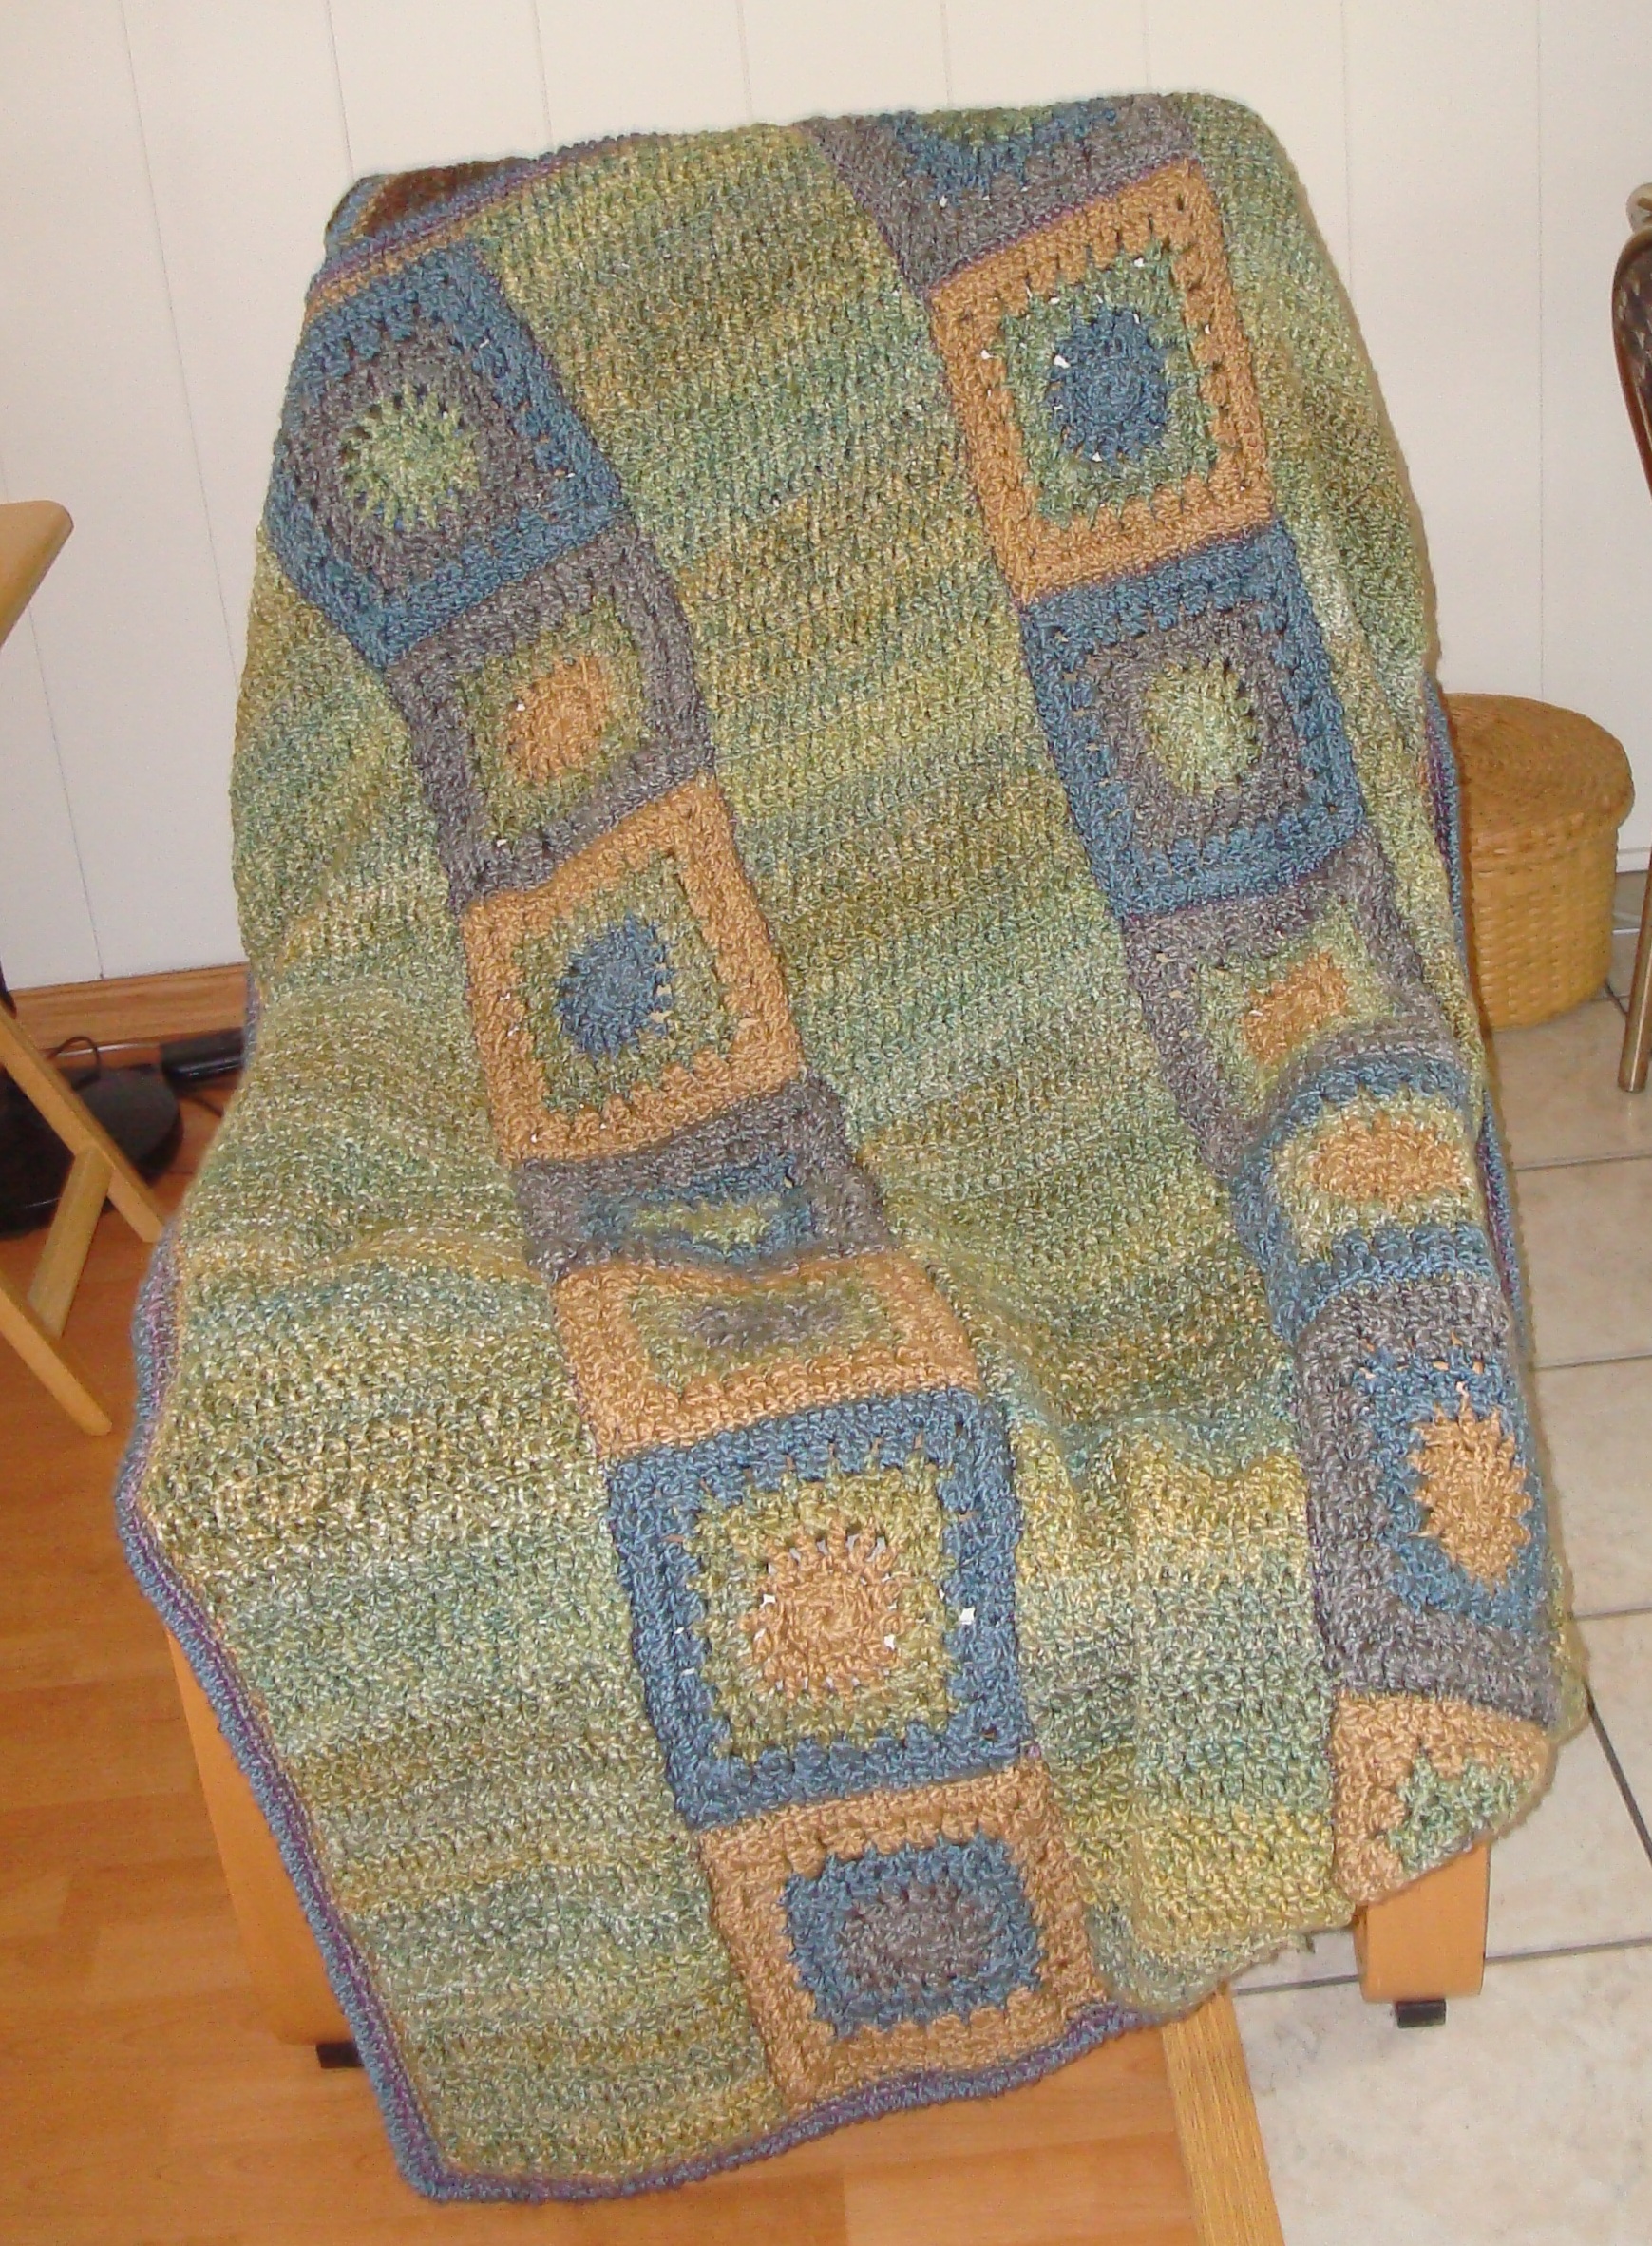
My second attempt is pictured above. I decided to create an actual cardigan instead of a shrug, thinking this would be a better way to show off the big granny square in the back. I adapted a really nice square motif called the Wheel Lattice Square I found during an extensive Internet search for the perfect motif. I used a larger crochet hook than the pattern calls for to create a 20-inch square that I thought (first mistake!) would be enough to fit across my back. The front left and right are created by sewing together two smaller Wheel Lattice squares which are supposed to be 10 inches across to match the 20-inch back.
After sewing the shoulder and side seams together, I double crocheted the sleeves in the round, decreasing a stitch at each end of every other row so they would taper. The sleeves are only three-quarter length because I ran out of yarn! I had just enough to do one row of single crochet around the cardigan edges and then a row of reverse single crochet. I dropped down a hook size to crochet this border to create a crisp, even edge.
Designing a Granny Square Cardigan – Lessons Learned
Long story short, the cardigan is too small for me. Yes, I can wear it, but I need to either crochet and attach some ties on the top edges or add a button because the cardigan doesn’t close all the way and tends to slip off my shoulders. Next time around, I will:
- Take my measurements and add an inch or so for ease to ensure a proper fit.
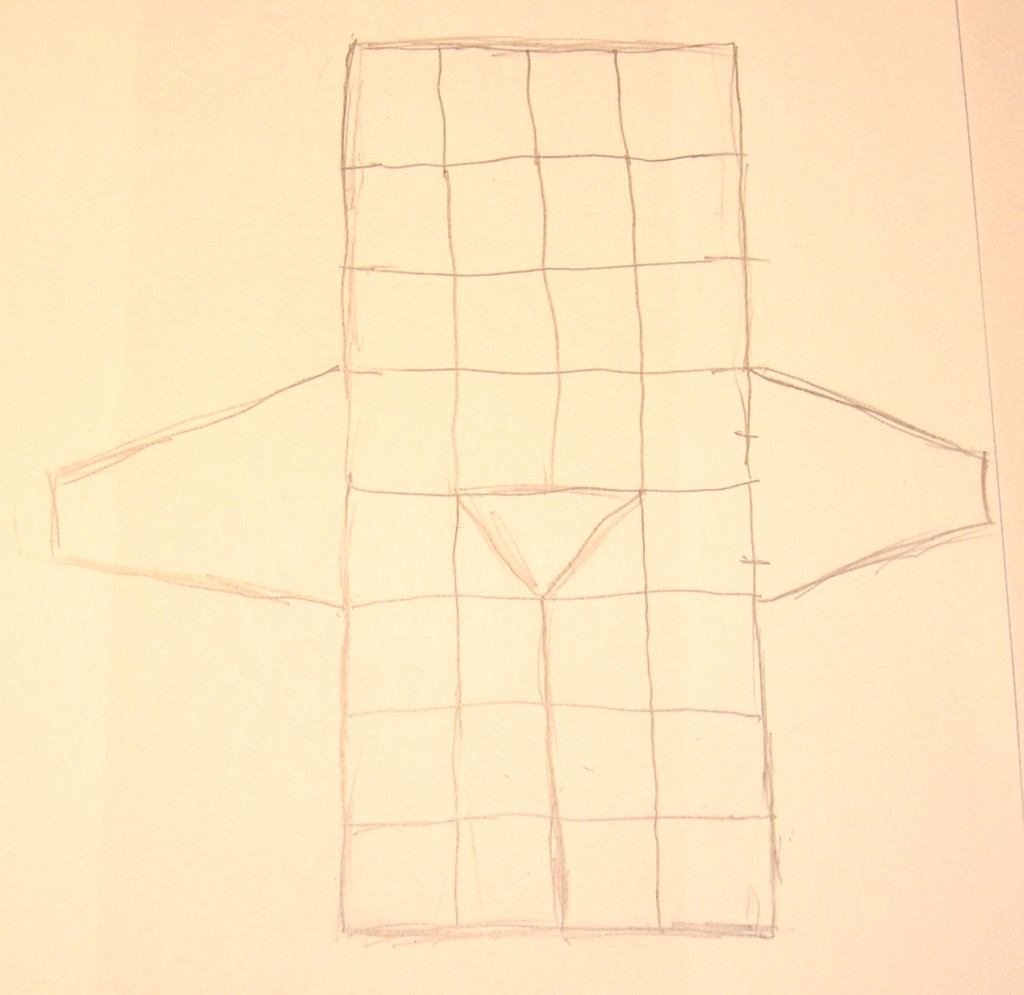
- Create a back that consists of four vertical rows of square motifs, two for the left back and two for the right back, matched by four rows to create the left and right fronts.
- Create a tapered neckline with “half-squares” (aka triangles).
- Do the math calculations (ugh!) required to ensure the square motifs fit into these measurements.
- Figure out how much yarn I’ll need and purchase enough to create a cardigan with full-length sleeves (I used stash yarn for this cardigan).
The big lesson I learned in Round 2 of my granny square cardigan design adventure is that I need to do a bit more planning at the outset before diving in and crocheting if I want wearables I crochet for myself to fit.

2 comments On Designing a Granny Square Cardigan – Round 2
Thanks for sharing your design process and lessons learned!
You’re welcome, Marie. There’s not a lot of information on the Internet about crochet design that’s freely available, so I am trying to do my part to fill the gap. Stay tuned; more to come. Can’t say when, but I’m determined to create a well fitting granny square cardigan :-).