This post contains affiliate links. Please read my Disclosure Policy for details. Thanks for your support!
UPDATE 7-2-19: This course has probably moved to Blueprint.com.
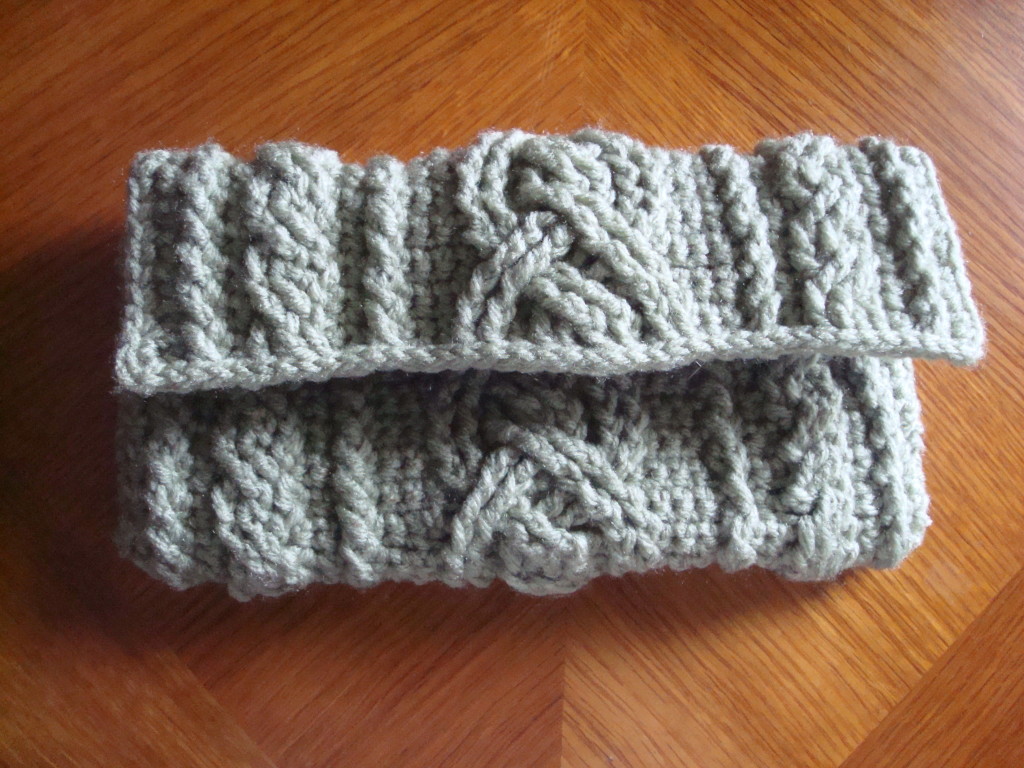
I recently signed up for and completed Craftsy’s Quick & Easy Crochet Cables Class taught by Shannon Mullett-Bowlsby of the designer team, Shibaguyz. I figured it would be a great way to learn how to create crochet cables and have a functional piece at the end of the class.
Class Highlights
In addition to Shannon’s clear explanations and demonstrations, one of the best things about the class was the symbol chart that accompanied the written instructions. Not only did I learn how to read what initially looked like a complicated mishmash of hieroglyphics, I barely had to glance at the written instructions and worked almost exclusively from the chart.
One of the things I didn’t want to do, however, was single crochet the seams of the clutch. Coming from a sewing background, I prefer the whip stitch or mattress stitch for a flat, invisible seam. So I tweaked the pattern a bit (something I always seem to be doing) by adding a single crochet edge around the entire clutch. This made it very easy to whip stitch the seams closed.
Lining My Bag
But before doing the final seaming, I decided to line the bag because it felt a little limp, and I figured the lining would add some body to it. And because the clutch is essentially a long rectangle, adding the lining was a piece of cake.
Selecting the Fabric
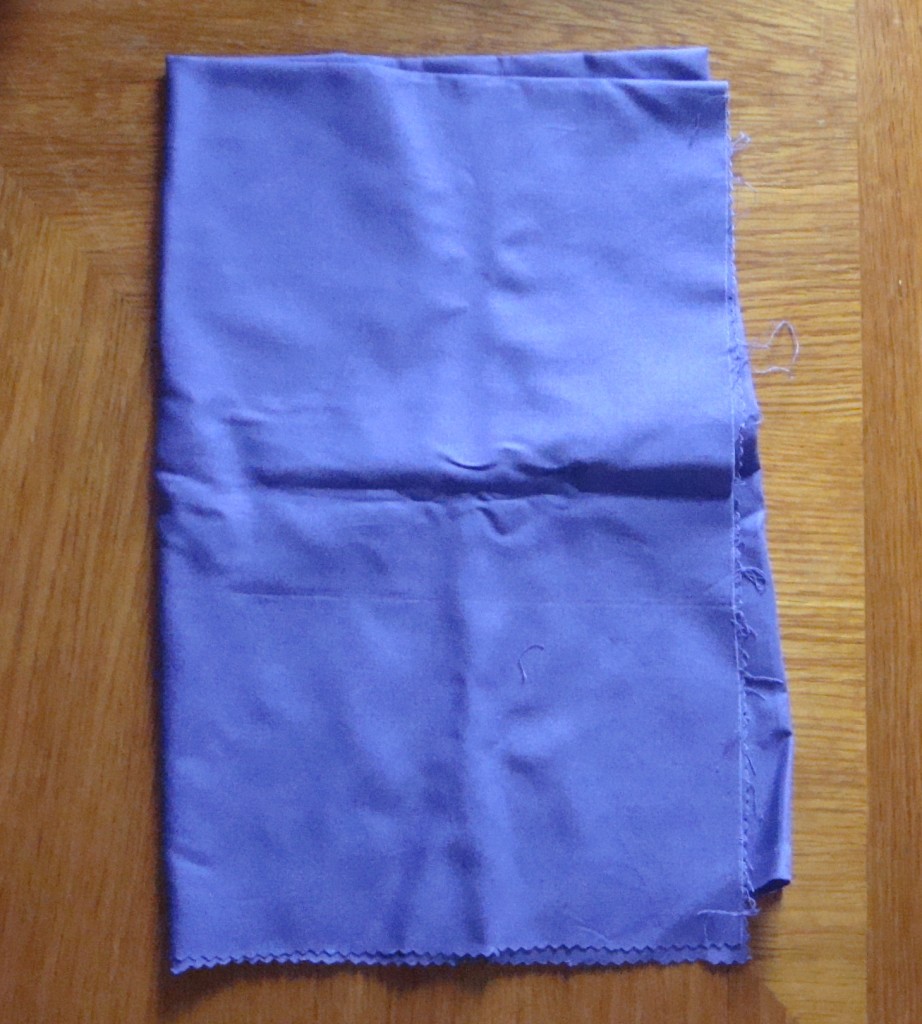
I selected a nice, purple cotton from my fabric stash. It’s a little heavy, but I knew it would soften after the first washing. In fact, I probably should have washed the fabric first, but I’d used it before to line the back of a big afghan and knew it wouldn’t shrink after being washed.
Cutting the Fabric
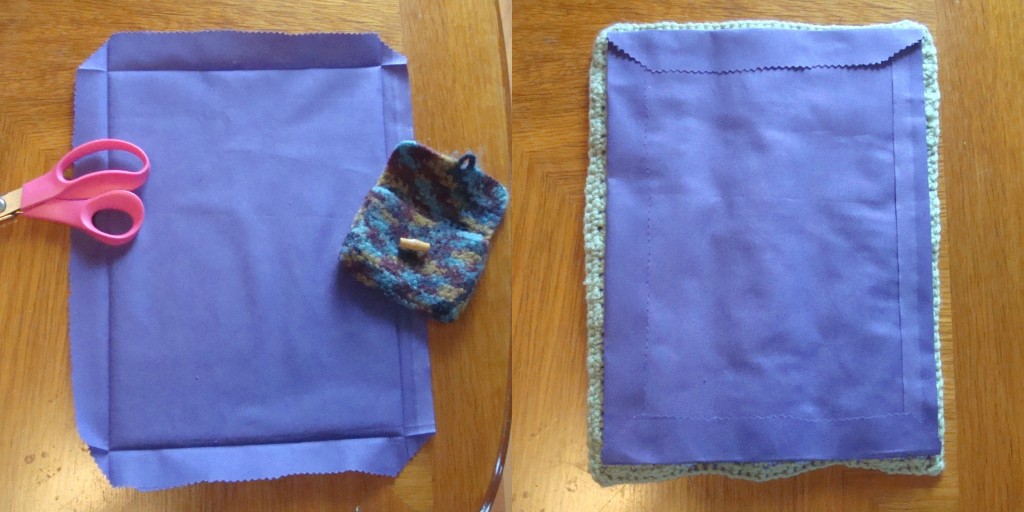
When I’m lining a crocheted bag, I usually place the bag over a piece of paper, trace around the edges, and then cut out a pattern that I pin to the fabric. But the rectangle was too long for a single sheet of 8.5 x 11″ computer paper, and I didn’t feel like taping paper together to accommodate its size.
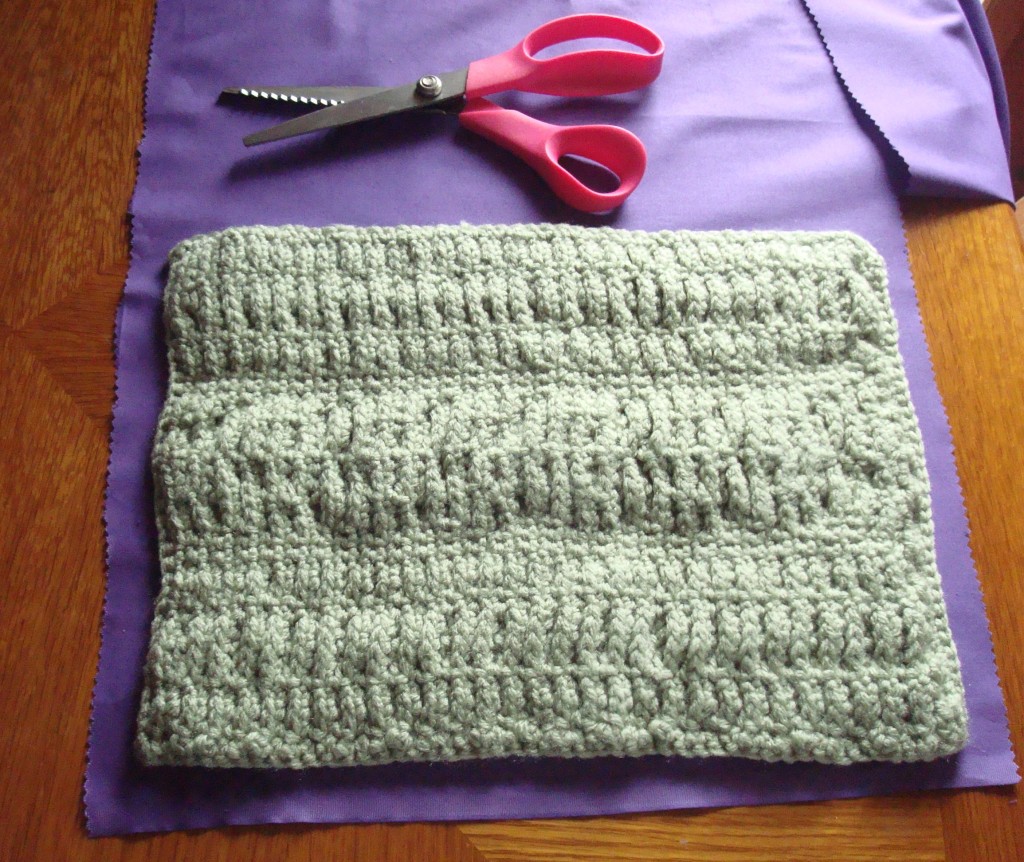
So I simply positioned the rectangle over the fabric and cut lines as straight as possible. Lining up one of the sides of the rectangle to the finished edge of the fabric meant I’d only have to cut three sides.
My seam allowance is pretty steep because I wanted to have enough fabric to make adjustments if I needed to. And I could always cut away any excess seam allowance once I got the edges folder over.
I used pinking shears to keep the raw edges from fraying.
Folding Over the Edges
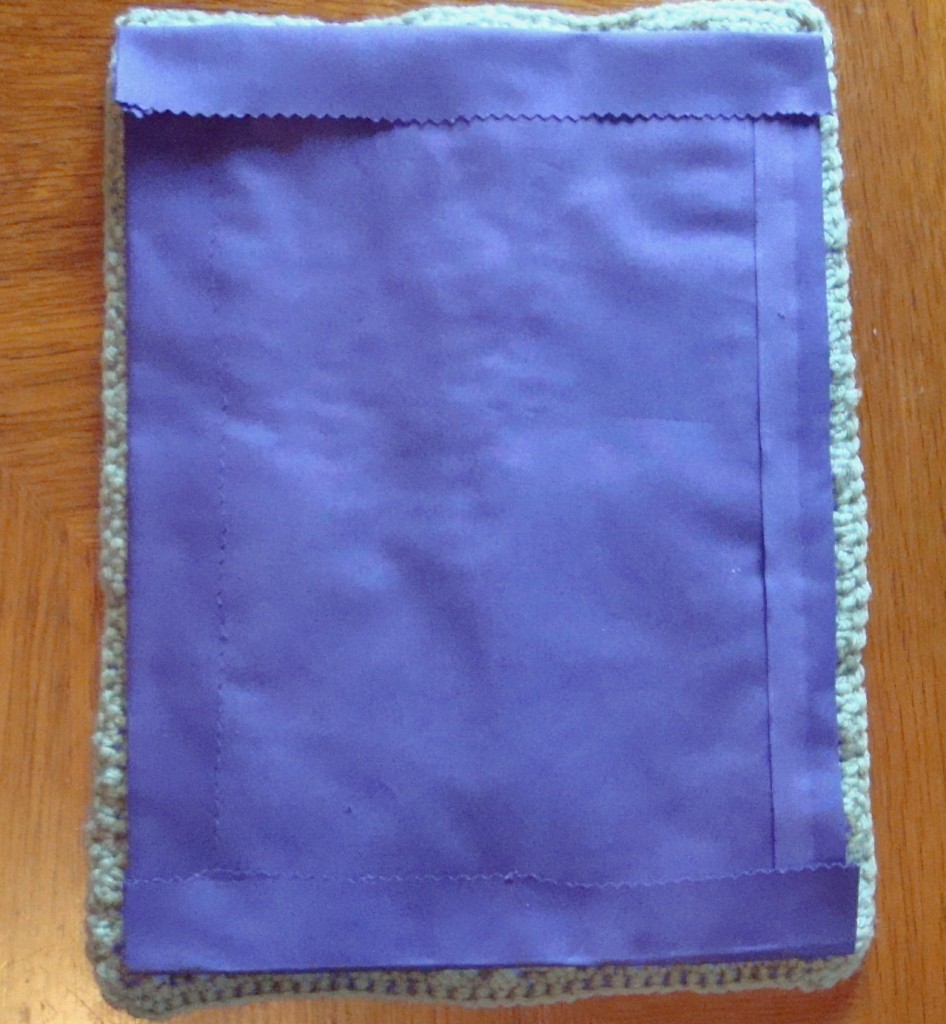
This was the trickiest part because I didn’t pin the edges into place (too lazy to get the pins) before ironing the folds flat. I did everything by “eyeing” my folds straight and then ironing them.
I did have to make some adjustments to create straighter folds, and I could do that easily because I had extra fabric in the seam allowance to work with. I could also spritz any old fold lines away with my steam iron.
Trimming the Corners
The last step I took before pinning the fabric to the rectangle was to trim the corners of the lining. In other words, I cut diagonally across each corner to get rid of the excess fabric that would prevent the corners from laying flat.
Pining the Lining to the Rectangle
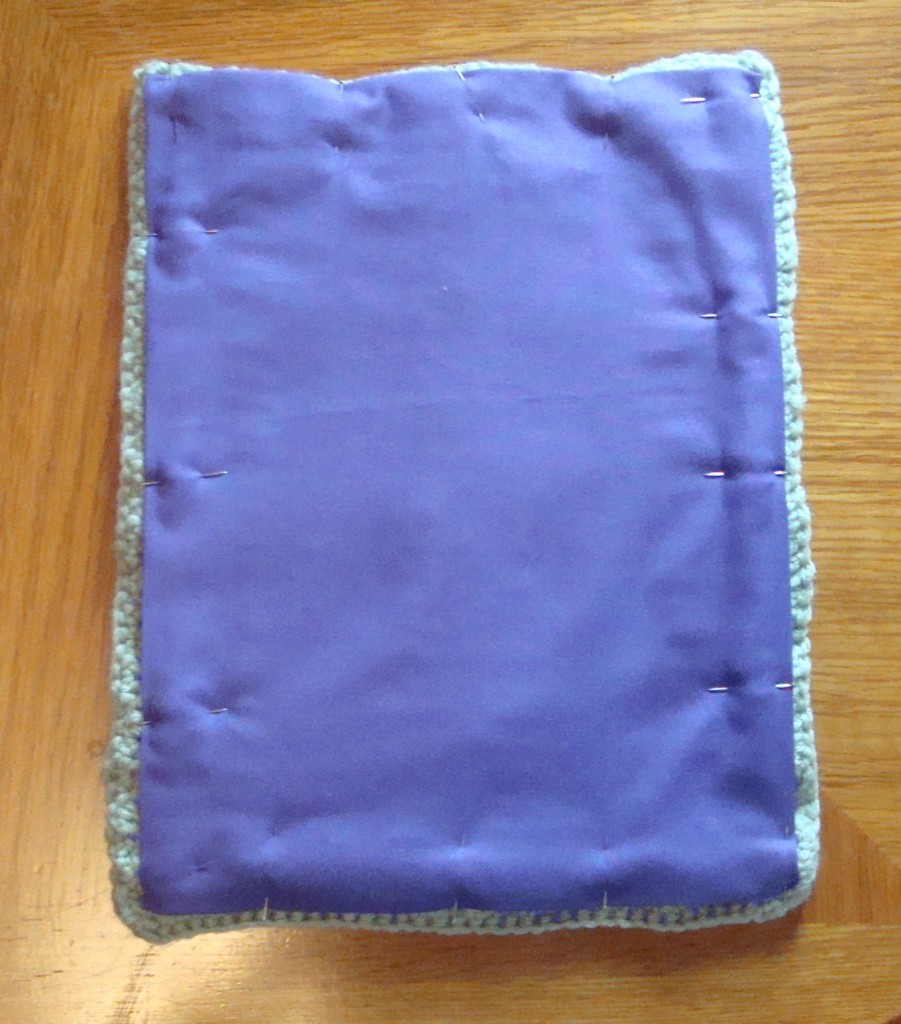
For this step I HAD to get the pins. With the wrong sides of the rectangle and the lining facing each other, I started by pinning each corner. Then I pinned the mid-point of each side. Finally, I added several pins between the corner and mid-point pins. This is the easiest way I’ve found to ensure the lining is correctly positioned on the rectangle.
My goal was to have the edge of the fabric touch the bottom edge of the single crochet stitches on the outer edge of the rectangle. This was a little difficult to do on the short ends of the rectangle because they curve a bit because of the cables. The final result isn’t perfect, but I can live with it.
Hand Sewing the Lining to the Bag
Because I didn’t want my stitches to show on the right side of the lining fabric that a whip stitch would create, I searched YouTube for a video demonstrating how to sew a “blind stitch”.
This search taught me that, in sewing, “blind stitch” means the stitch doesn’t show on the other side of the fabric, like whe you’re hemming a dress. Not quite what I was looking for.
But I did find a video that showed me how to do a “classic hem stitch” that worked perfectly and hardly shows.
What makes sewing fabric to a crocheted piece easy is that you don’t have to worry about picking up a thread or two to make the stitch. I could pick up a big hunk of the single crochet stitch as long as it didn’t show on the right side of the clutch. In fact, it’s critical that you do this; otherwise, the thread is going to eventually pull away from the yarn it’s secured to.
I also doubled my thread instead of using a single strand because a single strand wouldn’t be strong enough to hold the lining to the crocheted fabric during a machine washing (I used acrylic yarn for the clutch; too lazy to hand wash).
The sewn stitches have about two single crochet edging stitches between them.
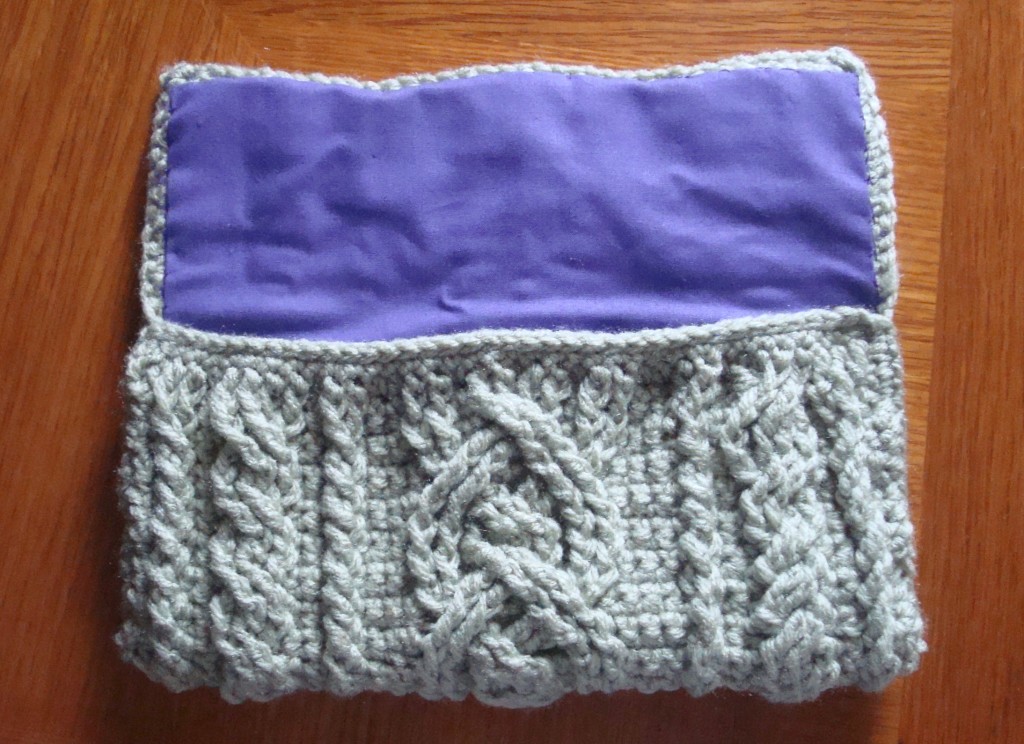
Voila! My Lined crochet cables Clutch
I think it turned out nicely, if I do say so myself. Now all I have to do is find those magnetic snaps Shannon used to close the clutch. Oh great, I found some. These Dritz snaps ought to work.
I highly recommend Craftsy’s Quick & Easy Crochet Cables . My next project will be to use wool for the same clutch and lightly felt it (which means I won’t have to line it!).
And I haven’t even tried the other cable stitch Shannon teaches in the course. More stuff to add to my ever-growing “to crochet” list. But I’m not complaining.

