Maybe “pattern” is too strong a word. What I’m about to show you could more accurately be called a “recipe” because I’m not going to give you step-by-step instructions like you’d find in a pattern. Instead, you’ll learn how to design your own top, using the yarn of your choice and custom-fit it to your exact measurements.
Where It All Began
This top is not my design. A good Facebook buddy and fellow crocheter, BrownSugar Ravenel, posted a photo of a top she made in one of the Facebook crochet groups we belong to. As soon as I saw it, I knew I wanted to make one for myself.
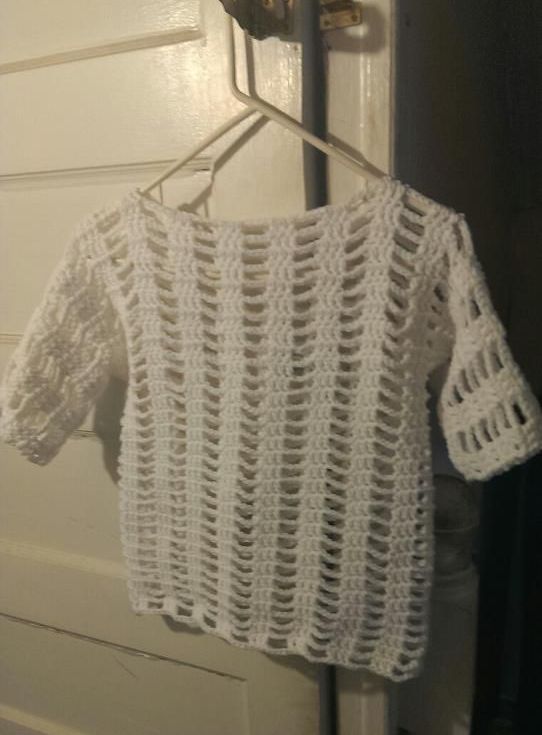
I had been searching for some warm-weather crochet top ideas for a couple of months and thought BrownSugar’s design would work well with a cotton or light weight yarn. She was kind enough to give me instructions for creating a top like hers.
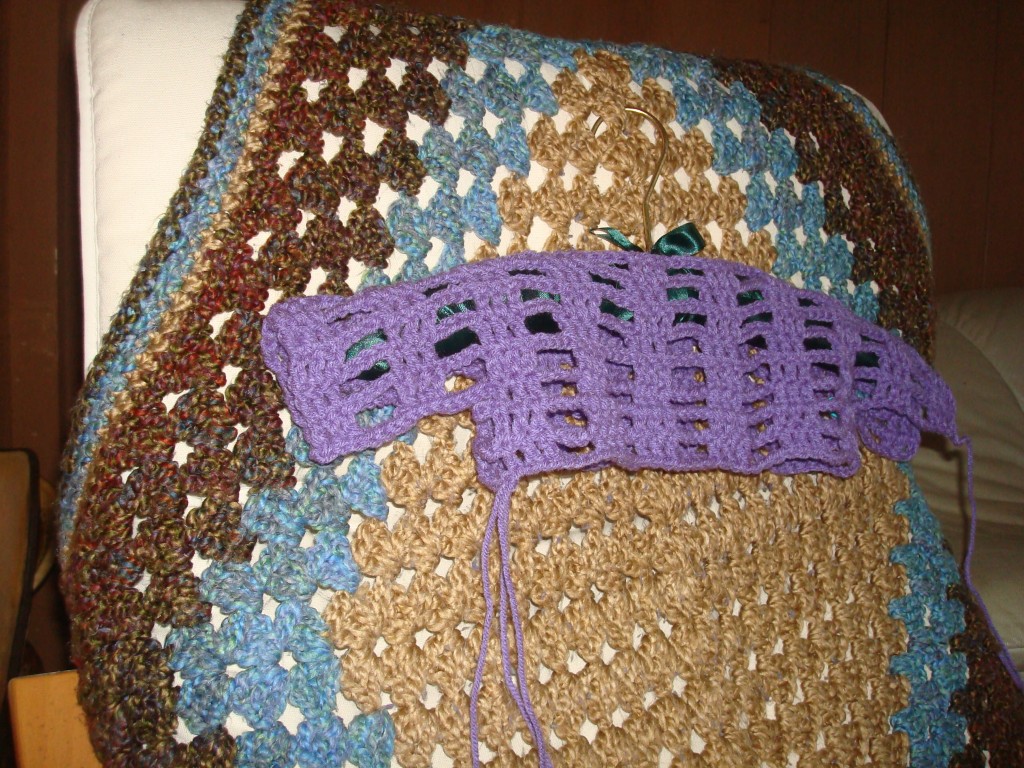
I created this little sample to make sure I was following her directions correctly. I didn’t need to finish it however because, at this point, I knew what to do to crochet an entire top and was ready to begin one I could wear.
Finding the Right Yarn
Honestly guys, I tried my best to use my stash yarn before going out and purchasing more, and I had some really nice yarns to choose from. But I couldn’t use any of them because I didn’t have enough.
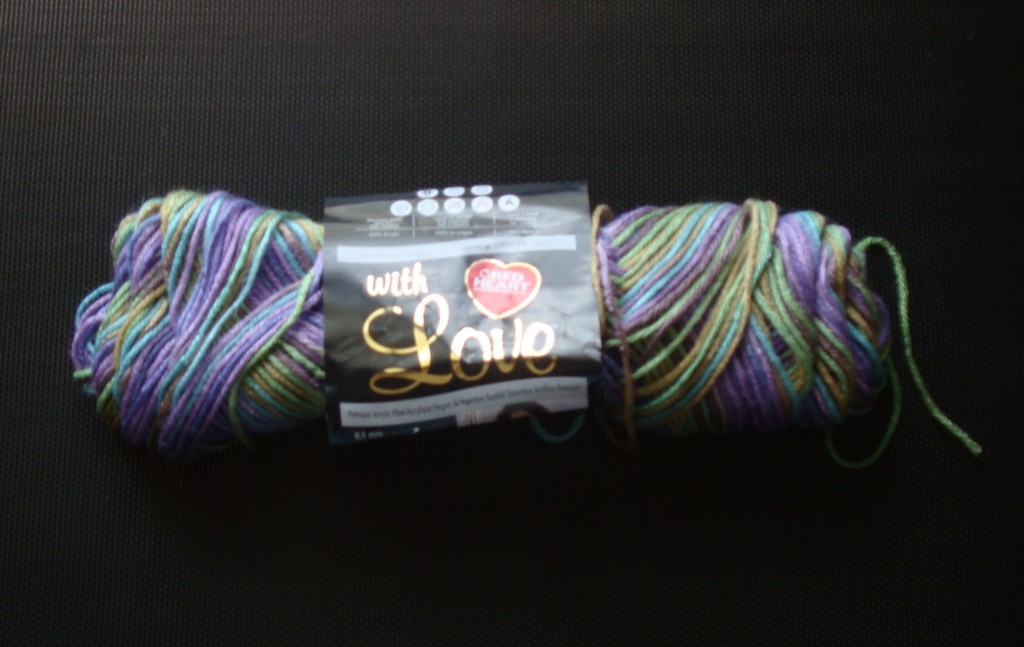
And then I remembered some yarn I purchased at Walmart a couple of weeks earlier. I typically don’t buy yarn without a project in mind. But when I saw some Red Heart With Love yarn in a color called Water Lily, I knew I was going to buy some because the colors in this yarn took my breath away. I bought three skeins, thinking that would be enough to complete a project, but I ended up having to go back for one more to finish this top.
And even though worsted weight yarn is a little too thick for Hawaii’s warm temps, I figured the lacy stitch pattern would result in a top I could wear, at least during the rainy season or on cool nights.
I needed four five-ounce skeins to finish my top, about two skeins per side, for a total of 920 yards. It’s easy to say, “Buy enough yarn to complete your project,” but not so easy to figure out how much you’ll need. Make the best estimate you can and purchase an extra skein or two to be on the safe side. If you have yarn left over, you’ll have a nice addition to your stash you can use in another project.
The Stitch Pattern
The stitch pattern BrownSugar used in her top consists of rows of three double crochets followed by four chains. I changed it a bit because of the “see-through” nature of her top; I didn’t want to have to wear anything underneath mine.
That’s one of the reasons why I like this design so much. You can use different combinations of stitches and chains to create the effect you want. I opted for a “4hdc – 3ch” stitch pattern which would give me more fabric and smaller holes.
Two Versions of this Crochet Top
There are actually two versions of this top. BrownSugar’s version incorporates sleeves, and I’ll show you how to make it in a minute.
The other version I discovered in a video on the bobwilson123 YouTube channel that helped me figure out a few minor details of my top. This is the first of two videos that shows you how to make the top. I’m sure I’ll do this sleeveless one at some point.
The Crochet Top Recipe – Planning
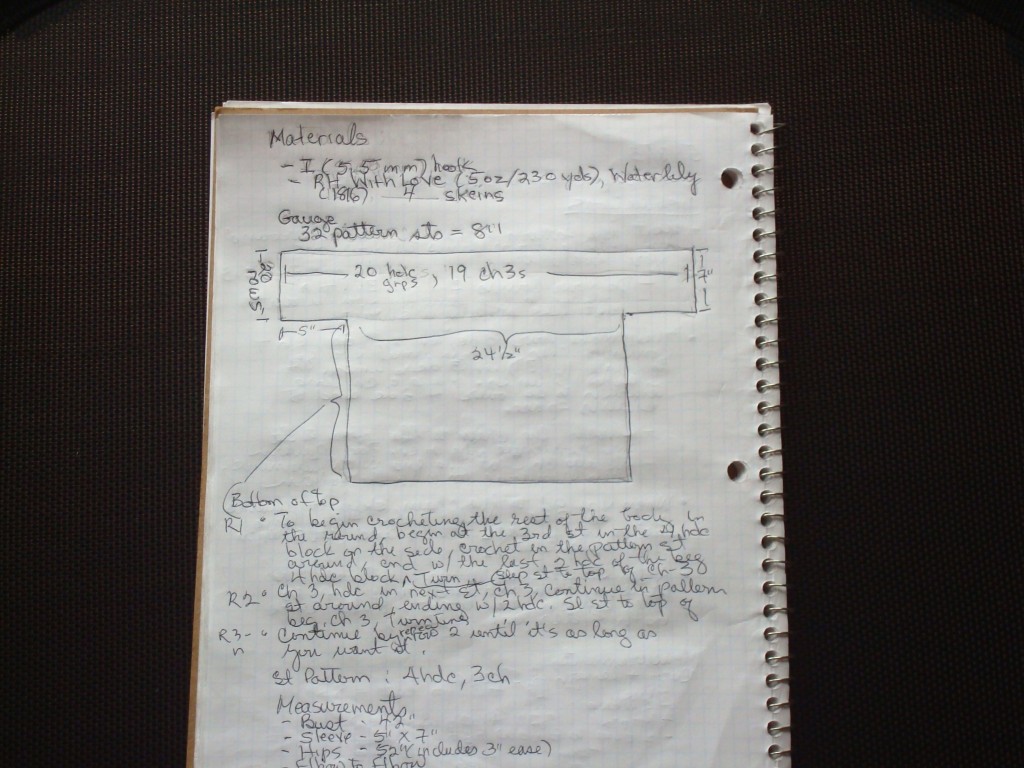
It’s a good idea to create a schematic diagram onto which you can record the results of your planning stage. I like to use graph paper to record my notes; it makes drawing straight lines a lot easier!
Here are the steps you need to take to plan your crochet top:
- Decide what your stitch pattern is going to be. You can create any combination of crochet stitches and chains.
- Choose a yarn and select a crochet hook size suitable for the yarn.
- Experiment with stitch patterns by making several swatches that are at least 4” by 4”; select a stitch pattern for your top from these swatches.
- Use the swatch with the stitch pattern you selected to determine your gauge (i.e., the number of stitches and chains per inch; you don’t need a row gauge).
- Take your measurements (you’ll need help to do this):
a. Hold your arms straight out so they are parallel to the floor.
b. Have someone measure from the point where you want the sleeve edge to fall on one arm across your back to the same point on the other arm.
c. Measure your bust and hips; choose the larger of the two measurements.
d. Decide how much ease you want in your top. If you want it to fit snugly, don’t add extra inches to the larger measurement. If you want a loose fitting top, add however man inches you need to the larger measurement to create the fit you want.
e. Divide the final measurement you got in 5d by 2. This will give you the width of one side of the bottom portion of the crochet top.
f. Decide how wide you want your sleeves to be. You want them to be wide enough for your arm to fit comfortably through the armhole. Plan on at least 7” for the sleeve length. This gives you a total of 14” for the armhole. If you’re not sure, measure the armhole of a top that fits you comfortably and divide it in half to get the length of your sleeves.
Record these measurements in your planning notes so you’ll have them ready when you need them. This planning stage is important so don’t skip it. Following these steps is what enables you to create a custom-fitted crochet top.
The Crochet Top Recipe – Execution
To crochet this top, you’re going to:
- Create one half of a bodice that incorporates the sleeves
- Create a neck opening
- Complete the second half of the bodice
- Add the bottom half by crocheting in the round.
The only seams you’ll have to sew are underneath the sleeves.
The Top Half or Bodice
The following photo shows you what the upper portion of your crochet top will look like once you have worked both halves.
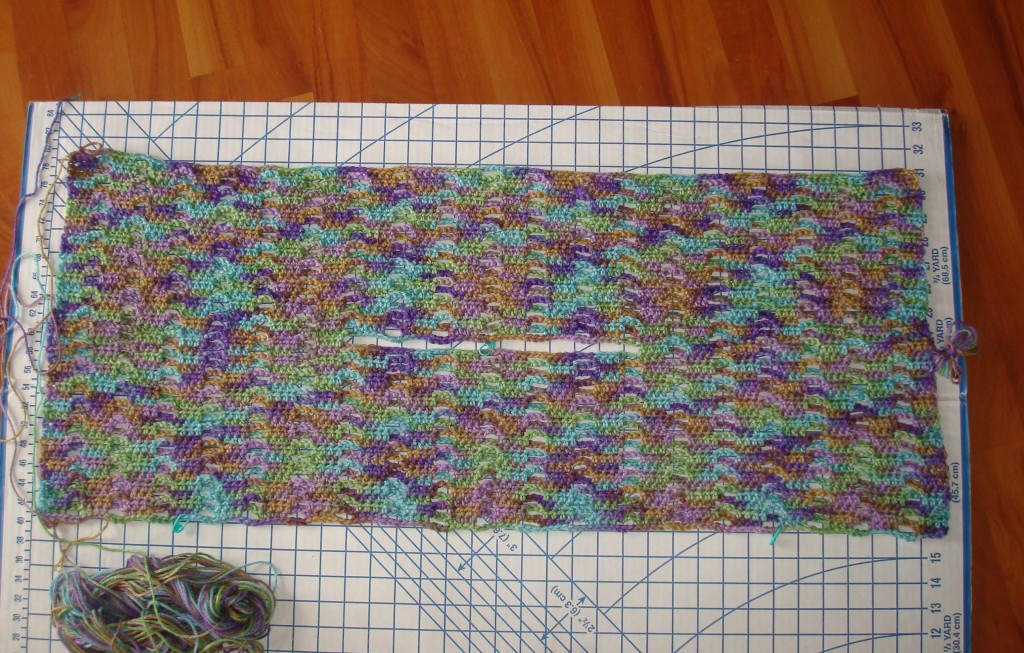
Your foundation chain is going to be the length of the first measurement you took – the one that measures from sleeve edge to sleeve edge (see 5a above). If you know how many stitches there are across a certain number of inches (i.e., your stitch gauge), you’ll be able to figure out how many chain stitches you’ll need for your foundation chain.
For example, the gauge for my crochet top is 32 stitches (half double crochets and chains) = 8 inches. To figure out the number of stitches in my foundation chain, I:
- Divided 8” into 34.5” (width from sleeve edge to sleeve edge) = 4.3
- Multiple 4.3 x 32 = 137.6 stitches in my foundation chain.
That comes out to 19 “4dc-3ch” groups plus 4 hdc sts (19 x 7 = 133 + 4 = 137). You might want to add several chains to the count you get to be on the safe side. You can always undo any unused chains (watch the video to see how this is done).
The main thing you want to remember is that your first row should begin with stitches (e.g., sc, hdc, dc) and end with stitches and not chains. So my first row begins with 4hdc and ends with 4hdc.
To 137 chains, I added one more chain since I will be starting the first row in the 3rd chain from the hook. The first two chains are my first hdc. As you do the second and subsequent rows, your turning chain will always be your first stitch; make your next one in the second stitch.
Continue crocheting in the pattern stitch until the first half of your bodice equals the sleeve length (see 5f above). Don’t cut your yarn. Spread the piece out so you can mark the neck opening.
The Neck Opening
To make the neck opening:
- Place a stitch marker at the center of the bodice by folding it in half and placing the stitch marker at the fold.
- Decide how wide you want the neck opening to be.
- With the right side facing you, place stitch markers an equal distance from the center marker on both sides. The stitch marker on the right side should be in the last stitch before the next chain group. On the left side, the stitch marker should be in the first stitch after the chain group.
- Crochet the next row in the stitch pattern to the first stitch marker, being sure to crochet in the marked stitch. Make the same number of chains as there are stitches and chains between the two markers. Don’t include the marked stitches in your count. Crochet in the next marked stitch and continue in the stitch pattern to the end of the row.
- On the following row, crochet in the stitch pattern over the stitches and the chain you made for the neck opening to the end of the row.
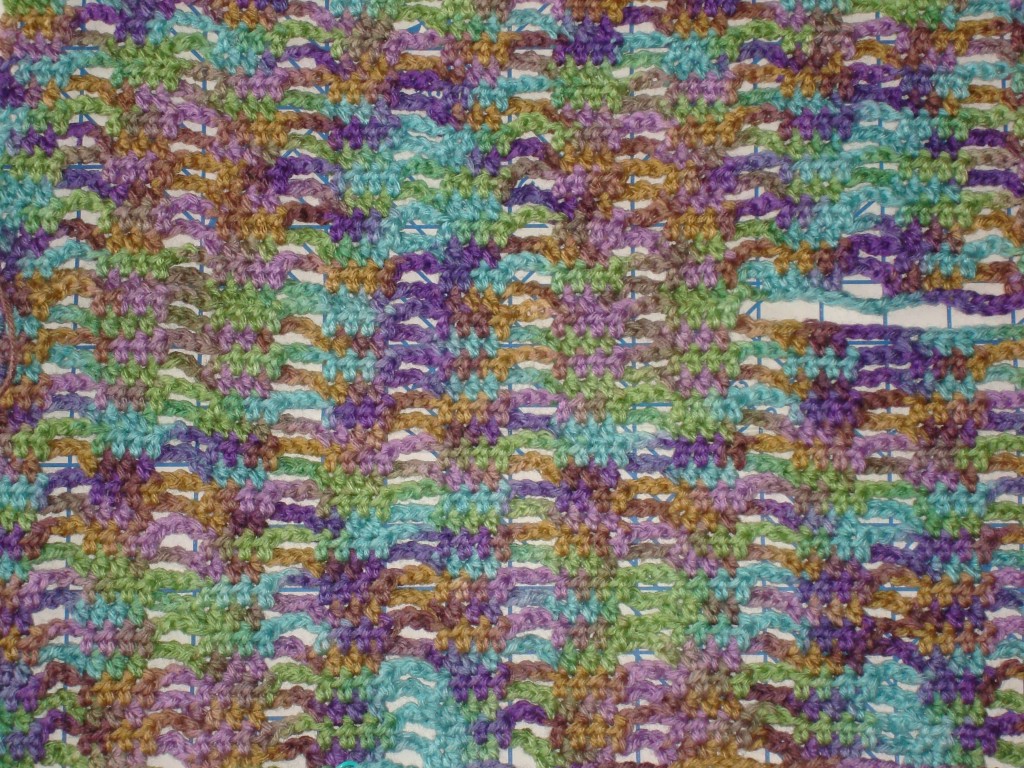
Continue crocheting the back portion of the bodice until it is the same length as the front.
The Bottom Portion
When you’ve completed the second half of the bodice, fold the piece in half. Your piece should look something like this.
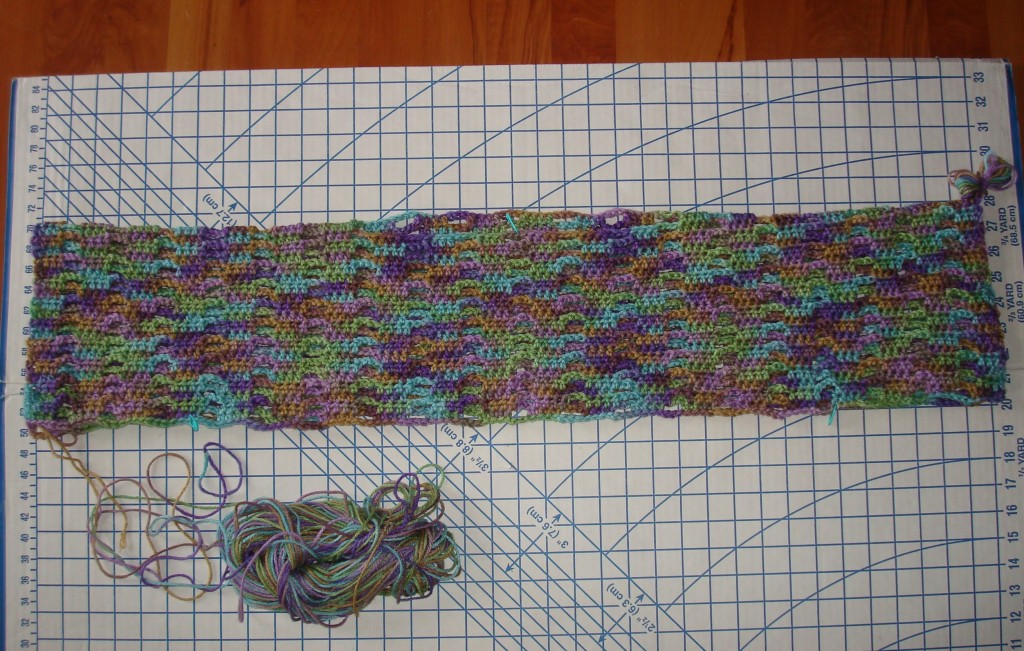
To create the bottom portion of the crochet top, you’re going to place stitch markers at either side of the lower edge of the bodice to equal the measurement you got in steps 5c through 5e. The width of the bottom portion of your top, not counting the sleeves, should be the number you got in step 5e.
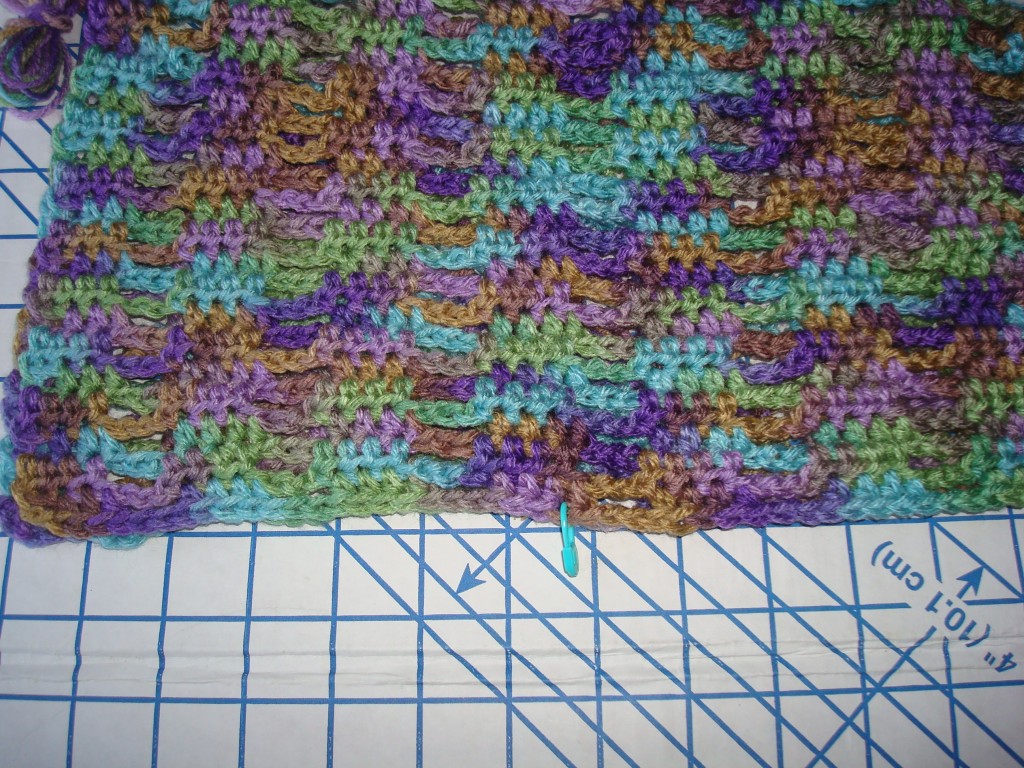
The stitch markers need to be placed in the middle of a stitch group, through both halves of the bodice, and not in the chain.
When you’re ready to attach the yarn, make sure the wrong side of the last row you crocheted is facing you.
In order to maintain the stitch pattern while you are crocheting in the round, start the round in the middle of the stitch group where a stitch marker is placed. If the wrong side of the last row you crocheted is facing you (the bodice will be upside down at this point), the stitch marker should be on the right side of the bodice edge.
My stitch group consists of 4hdc, so I attached the yarn to the 3rd hdc in the stitch group where the first stitch marker was placed and made a ch2 for the first hdc. I then worked a hdc in the last stitch of this group and continued in the stitch pattern to the stitch marker on the other side of the first half of the bodice.
At this point I made a hdc in the first two stitches of the 4hdc stitch group on the first half of the bodice where the next marker was placed. I then made a hdc in the last two stitches of the corresponding 4hdc group on the second half of the bodice. I continued across the edge in the stitch pattern and finished the round by making a hdc in the first 2 stitches on the second half of the bodice where the marker was placed and 2 hdc in the two remaining stitches of the 4dc group that I began the round with, on the first half of the bodice.
To close the round, I slip stitched to the top of the beginning ch2. Turning to go in the opposite direction, I made a ch2 for the first hdc and continued crocheting rounds in the stitch pattern until the bottom portion of the bodice was the length I wanted it to be. You’ll be beginning and ending your rounds in the middle of a stitch group.
Since the bodice was worked in rows, I wanted the bottom portion of the crochet top to match it. This is why I turned at the end of each round to start a new one.
Finishing Touches
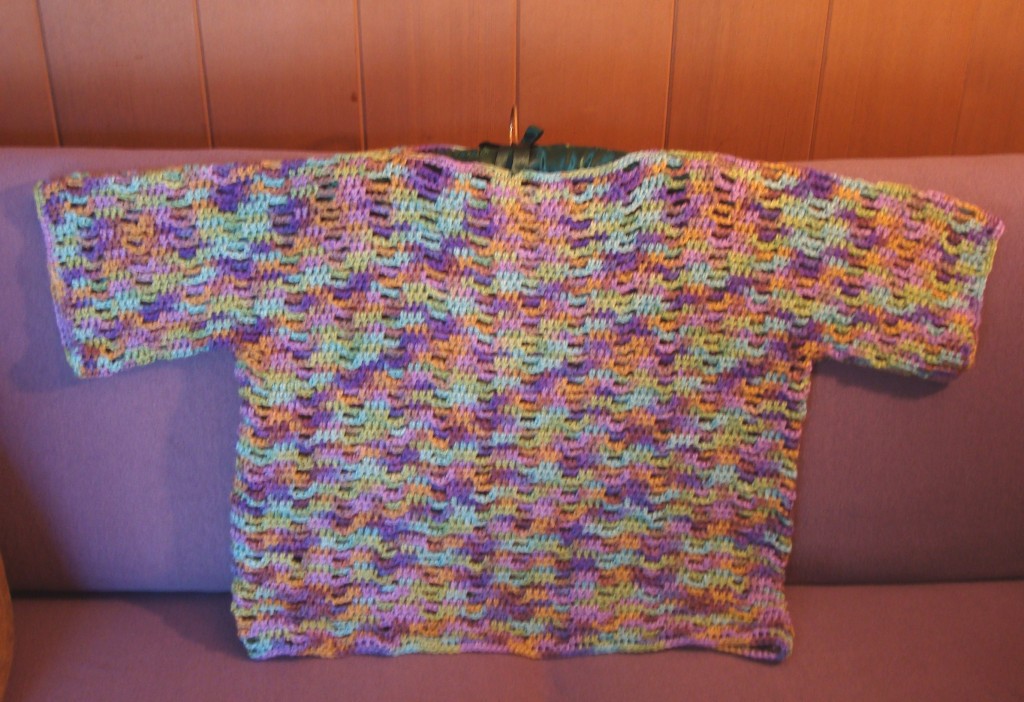
The only thing left for you to do is sew up your sleeve seams and crochet a round of single crochet around the neck opening, the bottom edge and the sleeve edges. Weave in your ends and you’re done.
I’m sure I’ll be making another one of BrownSugar’s tops, as well as the sleeveless one, since I recently found a boat load of cotton yarn in my stash.
If you have any questions about any part of this recipe, please let me know in the comment section below, and I’ll do my best to answer them. I can’t guarantee the instructions are error-free because they haven’t been tested. So I’m counting on you to let me know if there are any mistakes or if you don’t understand something. Thanks, and good luck!


8 comments On Versatile Summer Crochet Top Pattern
Wow Patrice. That is lovely. I can see why you had to make one for yourself. Thank you for explaining how you created it just for you. It helps when I try to make things for myself. (which I rarely do)
Hey Sara, I’m glad you like the crochet top. Believe me, you will want to make one for yourself. The design is really easy once you understand it. Thanks for reading and commenting!
Pingback: Crocheted Cropped Summer Top Pattern | Yarn Over, Pull Through ()
Pingback: Crochet A Customized Summer Top | Crochet | CraftGossip.com ()
Wonderful Patrice! This is one of my favorite methods for making tops and I love seeing your methods and learning how someone else does it. Thank you so much, happy crocheting!
Glad you enjoyed the blog post Susan. I’m working on another simple top that I hope to finish soon. Will blog about that one. Happy crocheting to you too.
Thanks for sharing Patrice, it has inspired me! I think I’ll make one for my 5yo first & see how it works
You’re welcome, Keryma. Glad the blog post inspired you. Great idea to try it in a small size first. If you can take a photo of the finished item, post a link here. I’d love to see it.
Sliding Sidebar
Categories
Privacy Overview